Integrating Lantern Data with MailChimp Using Zapier
If you prefer, you can check out this information in video format

In this guide, we'll walk you through the process of connecting your Lantern account to MailChimp via Zapier, enabling you to effectively use merge tags for personalized email marketing. This method ensures seamless data transfer from Lantern quizzes to MailChimp, allowing for targeted and customized email campaigns.
Step 1: Connect Lantern to Zapier
First, ensure that your Lantern account is connected to Zapier. Please refer to this article on how to connect Lantern to Zapier. This connection is crucial as it allows you to create a Zap (an automated workflow) that will transfer data from Lantern to MailChimp.
Step 2: Connect Lantern to MailChimp
Next, connect your Lantern account to MailChimp. This is done through the integrations tab in Lantern. You will need to create a private API key in MailChimp and use it to link the two platforms. You can refer to this article on how to connect Lantern to Mailchimp. After establishing the connection, ensure that the specific quiz you want to use is also connected to MailChimp by using the audience ID.

For this example, we are using a test quiz titled "Paws-itively Perfect: Find Your Dog’s Delightful Dish"

In MailChimp, we have a test audience named "PPF". You can find the unique audience ID under the settings of your audience in MailChimp, which needs to be copied and pasted into the quiz settings in Lantern.


Step 3: Create Merge Tags in MailChimp
In MailChimp, create additional merge tags for the data you want to capture from the quiz. For our pet food quiz, we created tags for the dog's favorite activity (tagged as "ACTIVITY") and the dog's coat (tagged as "COAT"). Additionally, we added a merge tag for the product recommendation (tagged as "PRODUCT"). These merge tags will allow us to use quiz data ( such as answers and recommended products) in our email campaigns.

Step 4: Configure Property IDs in Lantern
Within the Lantern quiz, assign property IDs to the answers that correspond to the merge tags in MailChimp. For example, if the merge tag in MailChimp is "ACTIVITY," ensure the property ID in Lantern is also named "ACTIVITY." This alignment simplifies the integration process and ensures data consistency.

Step 5: Create a Zap in Zapier
Creating a Zap involves setting up a trigger and an action to automate the data transfer from Lantern to MailChimp. Here’s a detailed guide:
- Access Zap Creation:
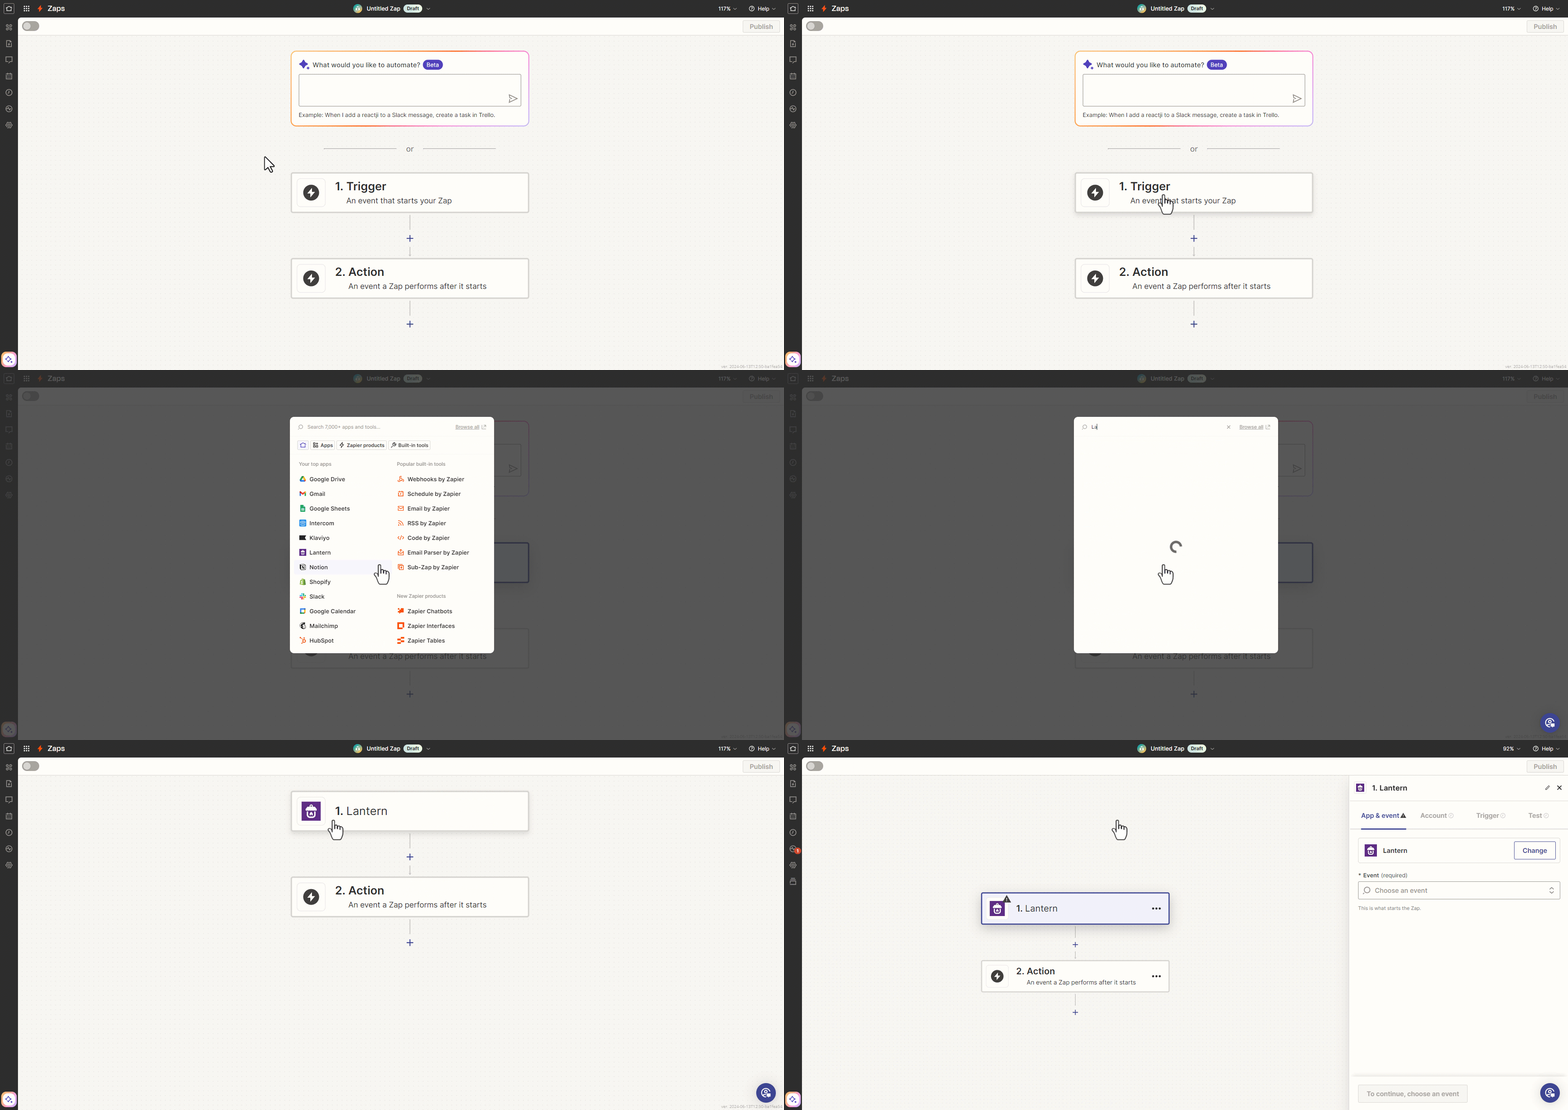
- From your Zapier dashboard, click on the "Create" button and select “Zaps”.

- Set Up the Trigger:
→ Choose App & Event:
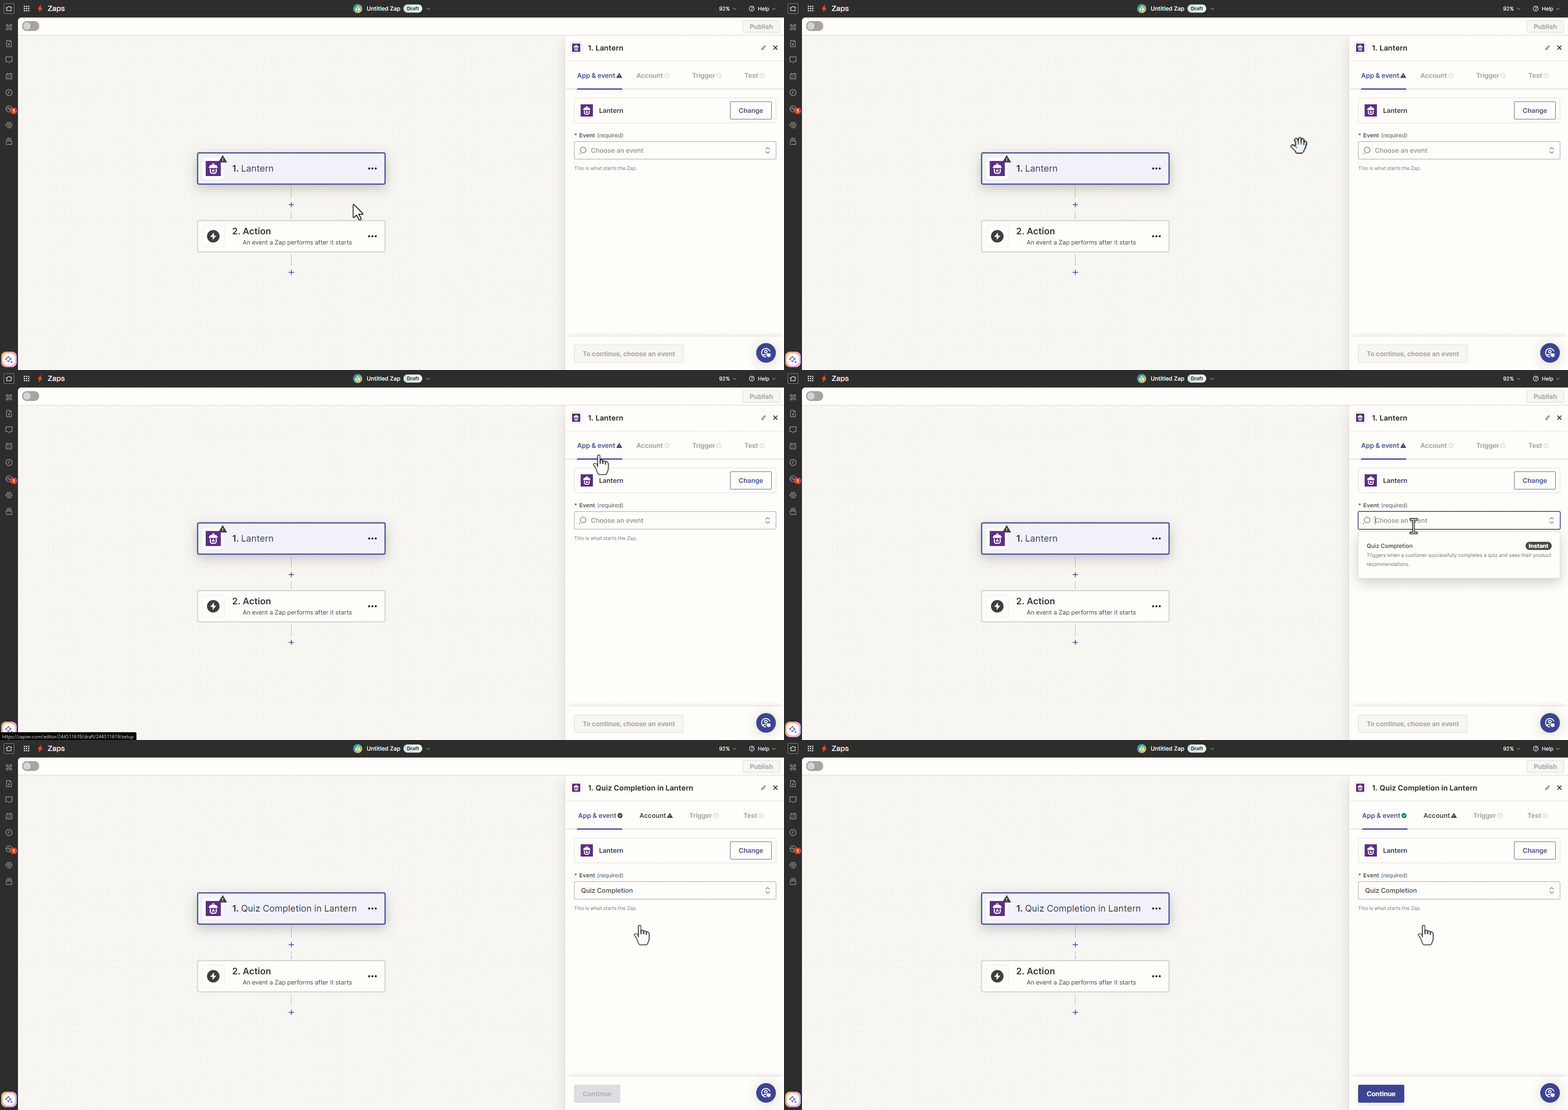
- In the "Trigger" section, search for "Lantern" and select it as the trigger app.

- For the event, select "Quiz Completion." This means the Zap will trigger when a quiz is completed in Lantern.

→ Choose Account:
- Connect your Lantern account if you haven’t already. You may need to log in and authorize Zapier to access your Lantern data.

→ Set Up Trigger:
- Choose the specific quiz you want to use by selecting its ID. For this guide, we’re using the "paws-itively-perfect-find-your-dogs-delightful-dish"

- Set the trigger only activate when an email address is provided. To do this, select the value of the email address property as "True."

→ Test Trigger:
- Test the trigger to ensure that Zapier can pull in data from Lantern. This test confirms that the connection is working correctly.


- Set Up the Action:
→ Choose App & Event:
- In the "Action" section, search for "MailChimp" and select it as the action app.

- For the event, choose "Add/Update Subscriber." This event will either add a new subscriber to your MailChimp audience or update an existing one.

→ Choose Account:
- Connect your MailChimp account if you haven’t already. You may need to log in and authorize Zapier to access your MailChimp data.

→ Set Up Action:
- Audience: Select the MailChimp audience where you want to add or update subscribers. For this guide, we’re using the PPF audience.
- Subscriber Email: Map the email field from the Lantern quiz to the subscriber email in MailChimp.
- Status: Set the status to "subscribed" to ensure the subscriber is added to your list.
- Update Existing Contacts: Choose "yes" if you want to update existing contacts in MailChimp.

- Map Additional Fields:
Once you select the Audience, additional fields such as name and merge tags will appear.
→ Name Fields: If your quiz captures the first name and last name of the subscriber, map these fields accordingly:
- First Name: Map the first name field from the Lantern quiz to the first name field in MailChimp.
- Last Name: Map the last name field from the Lantern quiz to the last name field in MailChimp.

→ Merge Tags:
- Map the Lantern quiz answers to the corresponding merge tags in MailChimp. For instance:
- Favorite Activity: Map the property ID "ACTIVITY" from Lantern to the merge tag "ACTIVITY" in MailChimp.
- Dog’s Coat: Map the property ID "COAT" from Lantern to the merge tag "COAT".
- Product Recommended: Map the product title field from Lantern to the merge tag "PRODUCT"

→ Test and Review the Zap:
- Click "Continue" and “Test Step” to ensure that the action works correctly. Zapier will add a test subscriber to your MailChimp audience based on the test data from Lantern.

- Review the test results to ensure everything is set up correctly.

- Publish the Zap:
- Once your test is successful, give your Zap a meaningful name and publish it. The Zap will now automatically run whenever a quiz is completed in Lantern, transferring the data to MailChimp.

By following these steps, you can seamlessly integrate Lantern quiz data with MailChimp, including capturing and transferring subscriber names for personalized and targeted email campaigns. For more tutorials and support, visit our website or contact our support team.